Over the past year I have been spending more and more time with AWS Lambda. The power of the AWS server-less compute platform is tremendous.
As a side project, I recently decided to test my skills, and Lambda, to see if I could build my own automated crypto trading platform.
In this blog series, I will show you how I built my crypto trading bot and how to use various features of AWS to make the bot possible. This is part 1, where we will get everything setup and build our initial Lambda function to get crypto prices.
Design
For this project I am going to build a simple, event driven, cloud application.
Rather than a traditional process that runs constantly on an EC2 instance, we are going to use a series of triggers from SQS messages to run Lambda functions.
At a high level, the application will look like this:
- Periodically (i.e., every minute) retrieve prices for coins I want my bot to track
- Evaluate each price retrieval against criteria I set (i.e., price level)
- Execute a trade (or not)
We will also design the application so we can use it to backtest various strategies by “replaying” market data.
We will be using the Coinbase API.
AWS Components
The application will use the following AWS components:
- Lambda (and the Cloud9 editor – which I really like)
- RDS MySQL
- SQS
- SNS
- EventBridge
- IAM Roles
- EC2
- Secrets Manager
Setting up an IAM Role for Lambda
By default, each Lambda function is created with its own unique IAM role. You can move more quickly if you create a common IAM role that all of your functions can use to access resources. That way every time you create a new function, you do not have to redefine the same permissions.
Our IAM role will provide permissions to access the services I mention above.
- Navigate to the AWS IAM console
- Select Policies on the left nav
- Click “Create policy”
- In the first step of the Create Policy wizard, you can either use the Visual Editor to select the policies shown below, or you can cut and paste the JSON below.
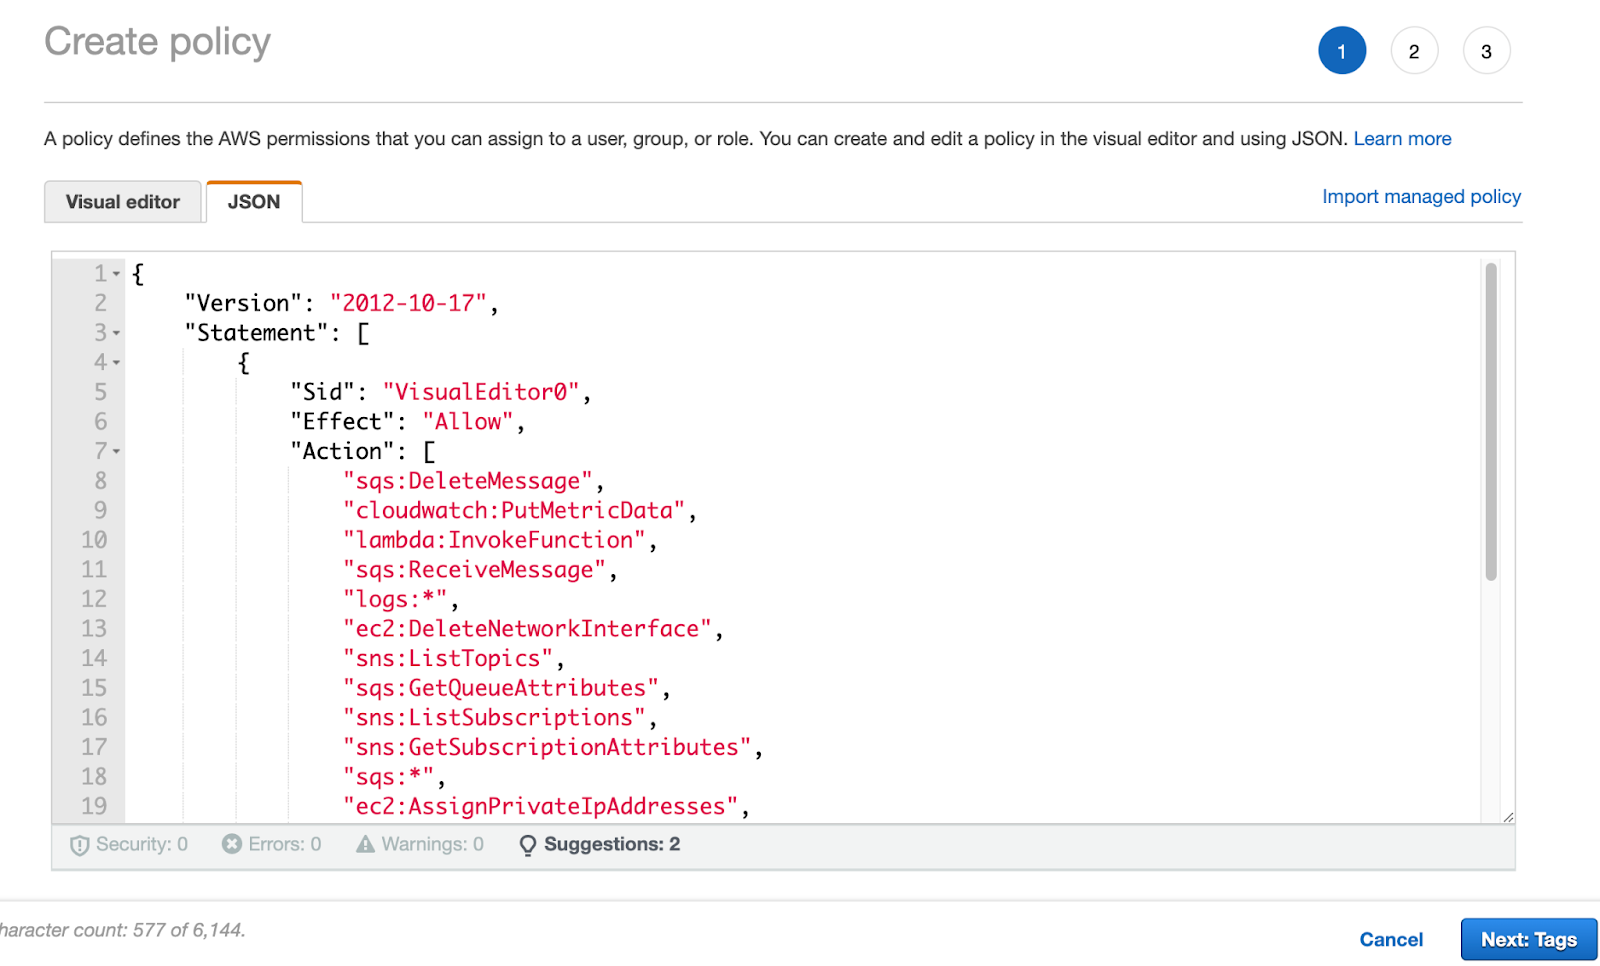
JSON:
{
    "Version": "2012-10-17",
    "Statement": [
        {
            "Sid": "VisualEditor0",
            "Effect": "Allow",
            "Action": [
                "sqs:DeleteMessage",
                "cloudwatch:PutMetricData",
                "lambda:InvokeFunction",
                "sqs:ReceiveMessage",
                "logs:*",
                "ec2:DeleteNetworkInterface",
                "sns:ListTopics",
                "sqs:GetQueueAttributes",
                "sns:ListSubscriptions",
                "sns:GetSubscriptionAttributes",
                "sqs:*",
                "ec2:AssignPrivateIpAddresses",
                "logs:CreateLogGroup",
                "logs:PutLogEvents",
                "ec2:CreateNetworkInterface",
                "logs:CreateLogStream",
                "sns:Publish",
                "secretsmanager:GetSecretValue",
                "ec2:DescribeNetworkInterfaces",
                "ec2:UnassignPrivateIpAddresses"
            ],
            "Resource": "*"
        }
    ]
}- Click Next to move to Tags.
- Click Next to move to Review.
- Give your policy the name Aither-Crypto-Lambda-Access and click “Create policy”.
You should now have a policy created that looks like this:
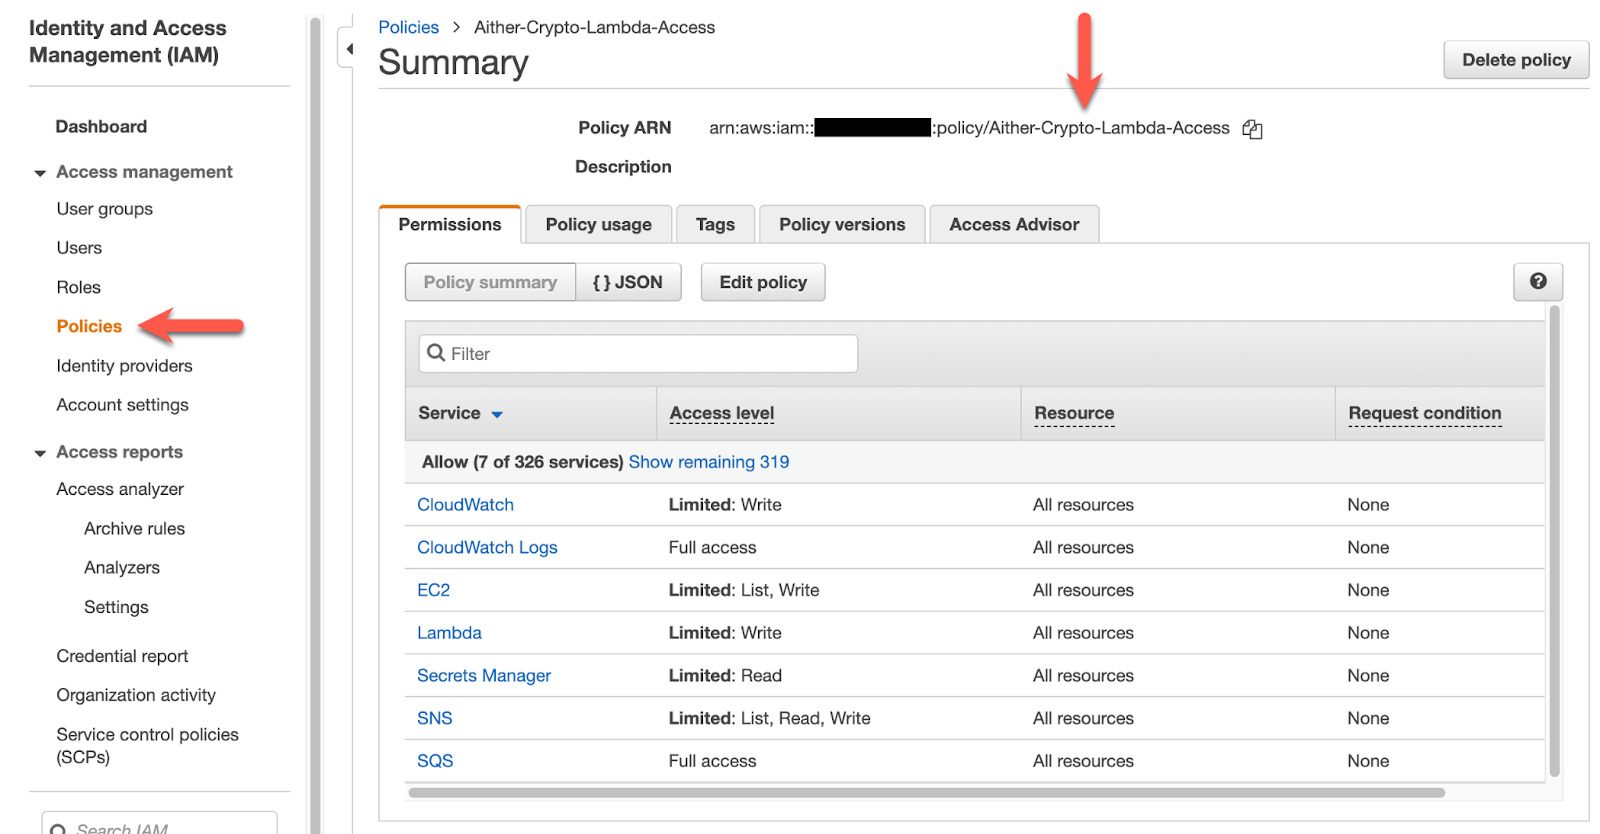
Next, we need to create a Role that uses our Policy.
- Navigate to IAM->Roles
- Click “Create role”
- Select AWS Service and Lambda, as shown below and click Next.
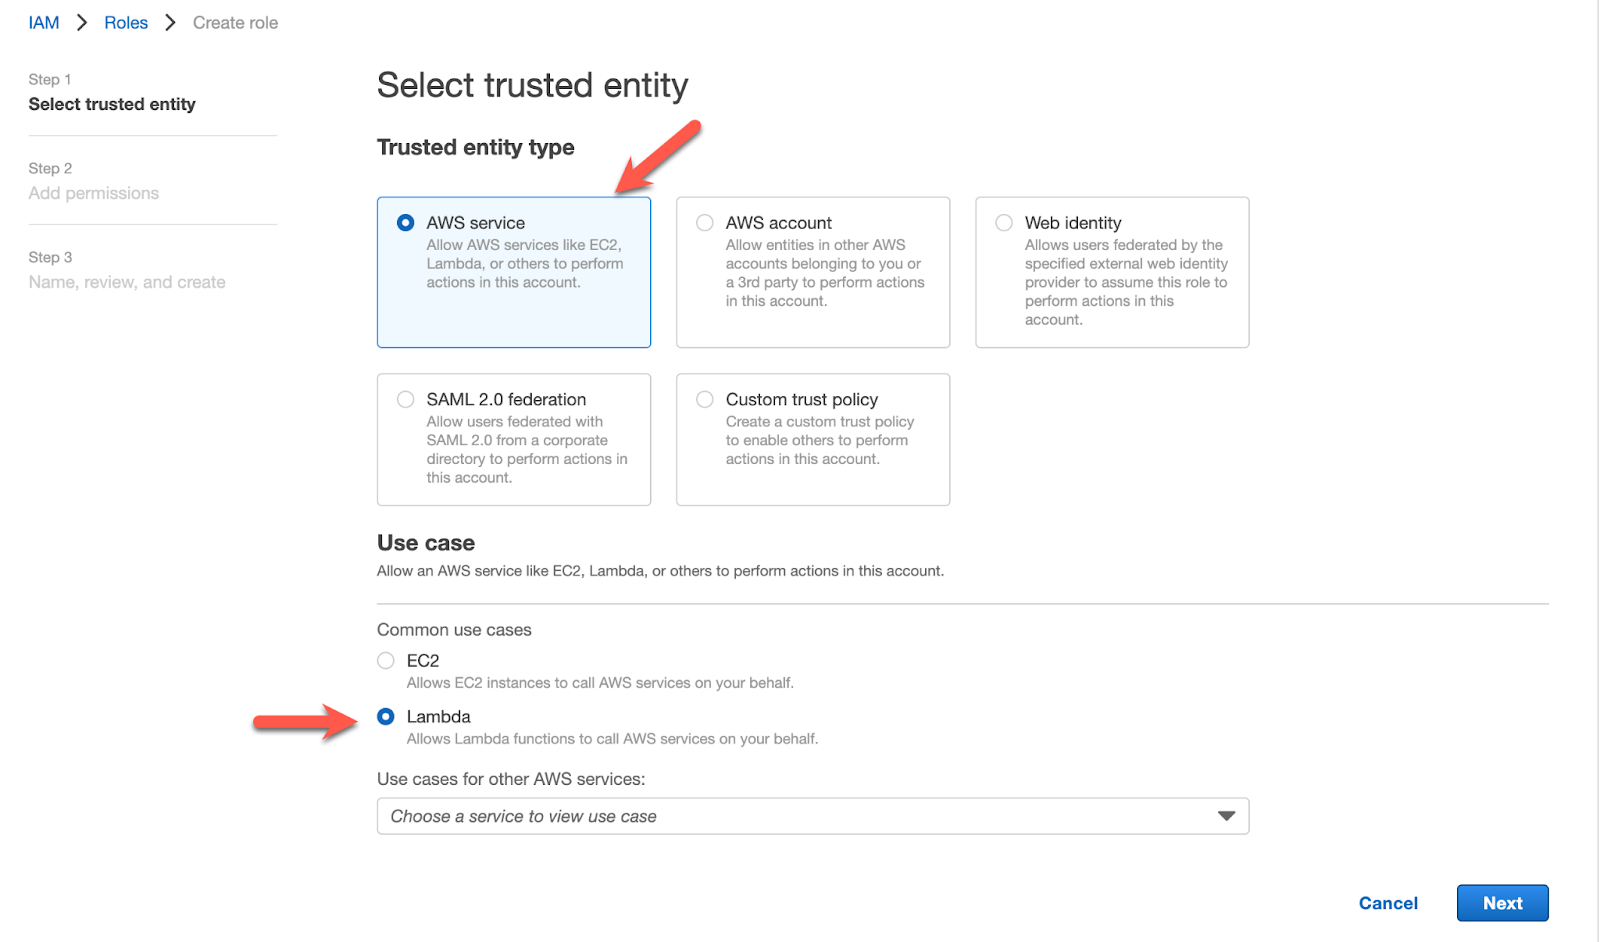
- Find the Aither-Crypto-Lambda-Access policy we created above and select it. Click Next.

- On the last screen of the wizard, name the new Role “Aither-Crypto-Lambda-Role” and click “Create role”.
Create a Lambda Function To Get Prices
Pick a region to put all of your functions and infrastructure into (we will use us-east-2, Ohio).
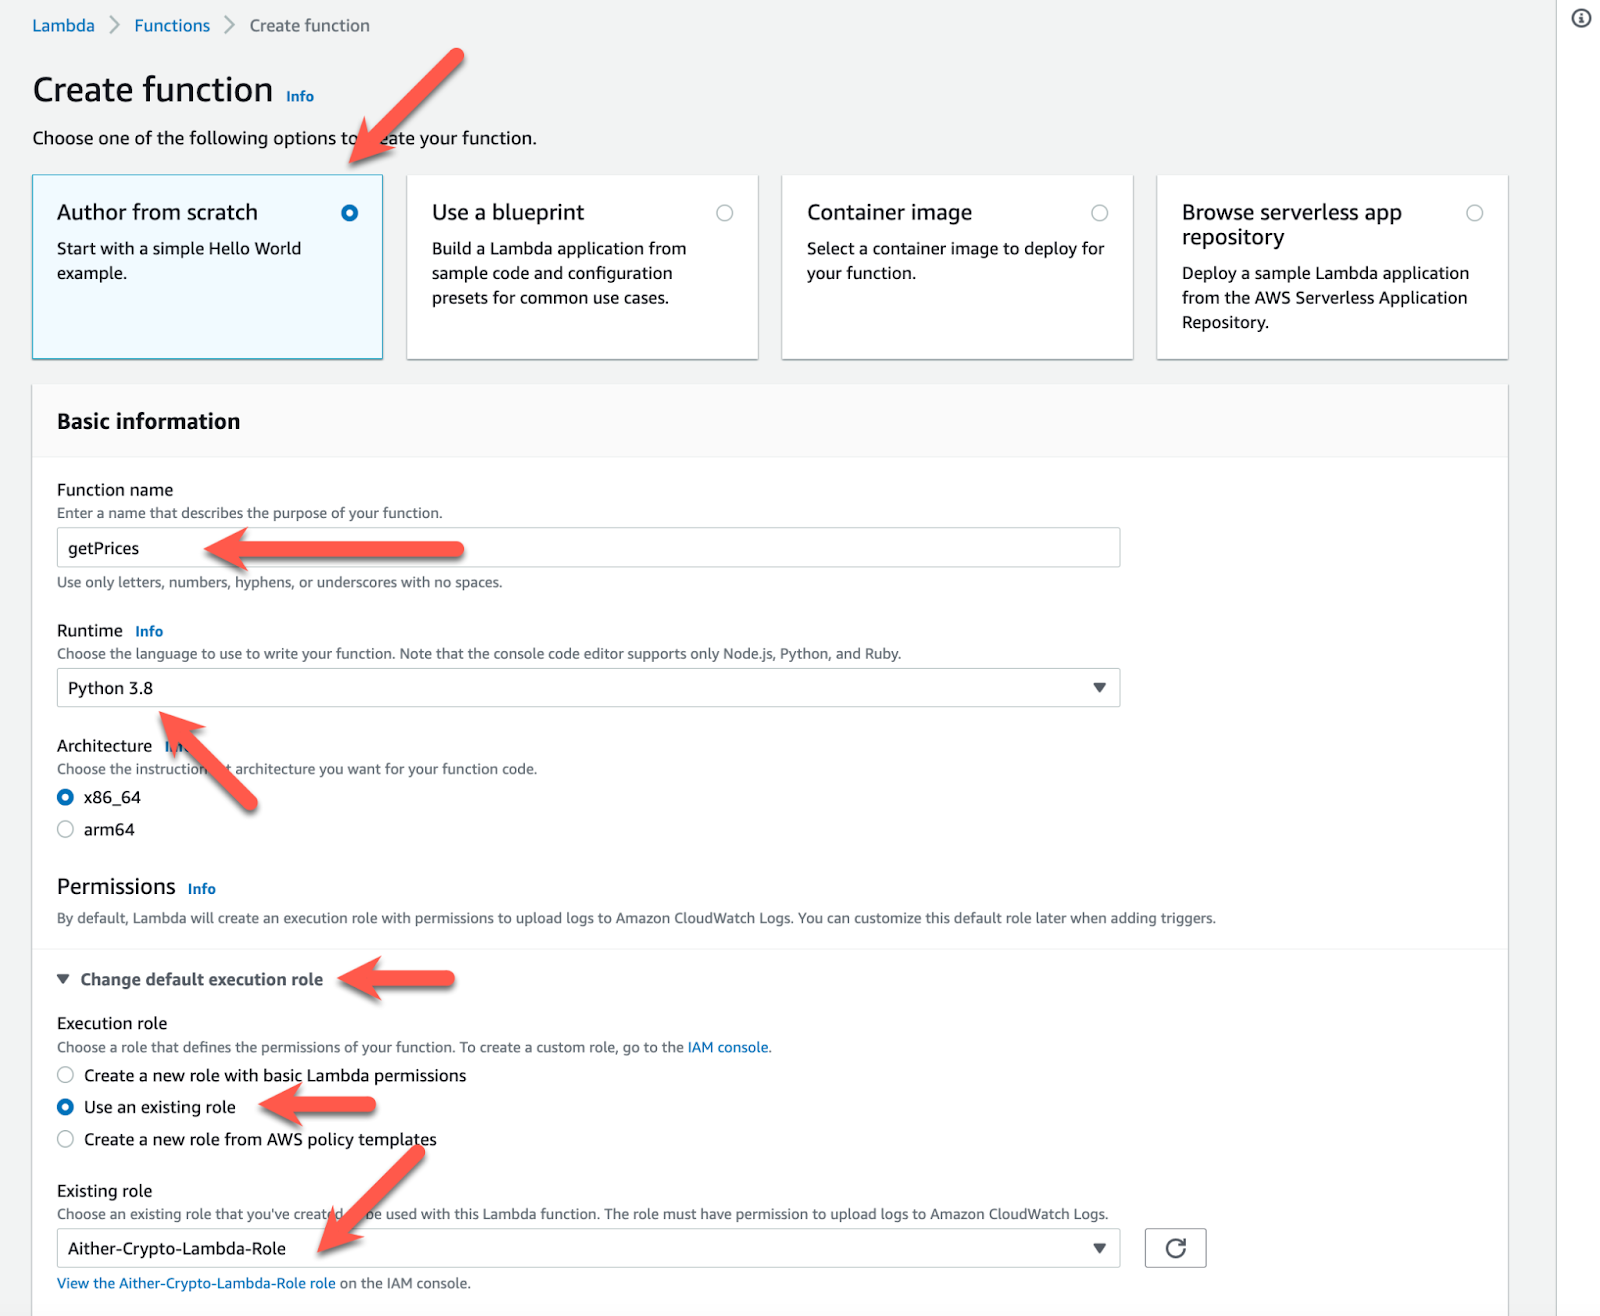
Create a new Lambda function called getPrices.
The function is going to use Python 3.8 (not 3.9 or higher – the version is important here because as of June 2022 some of the open source library ARNs we will import later only support up to 3.8).
Expand the “Change default execution role” section and select the IAM role “Aither-Crypto-Lambda-Role” that we created earlier.
Adding Code
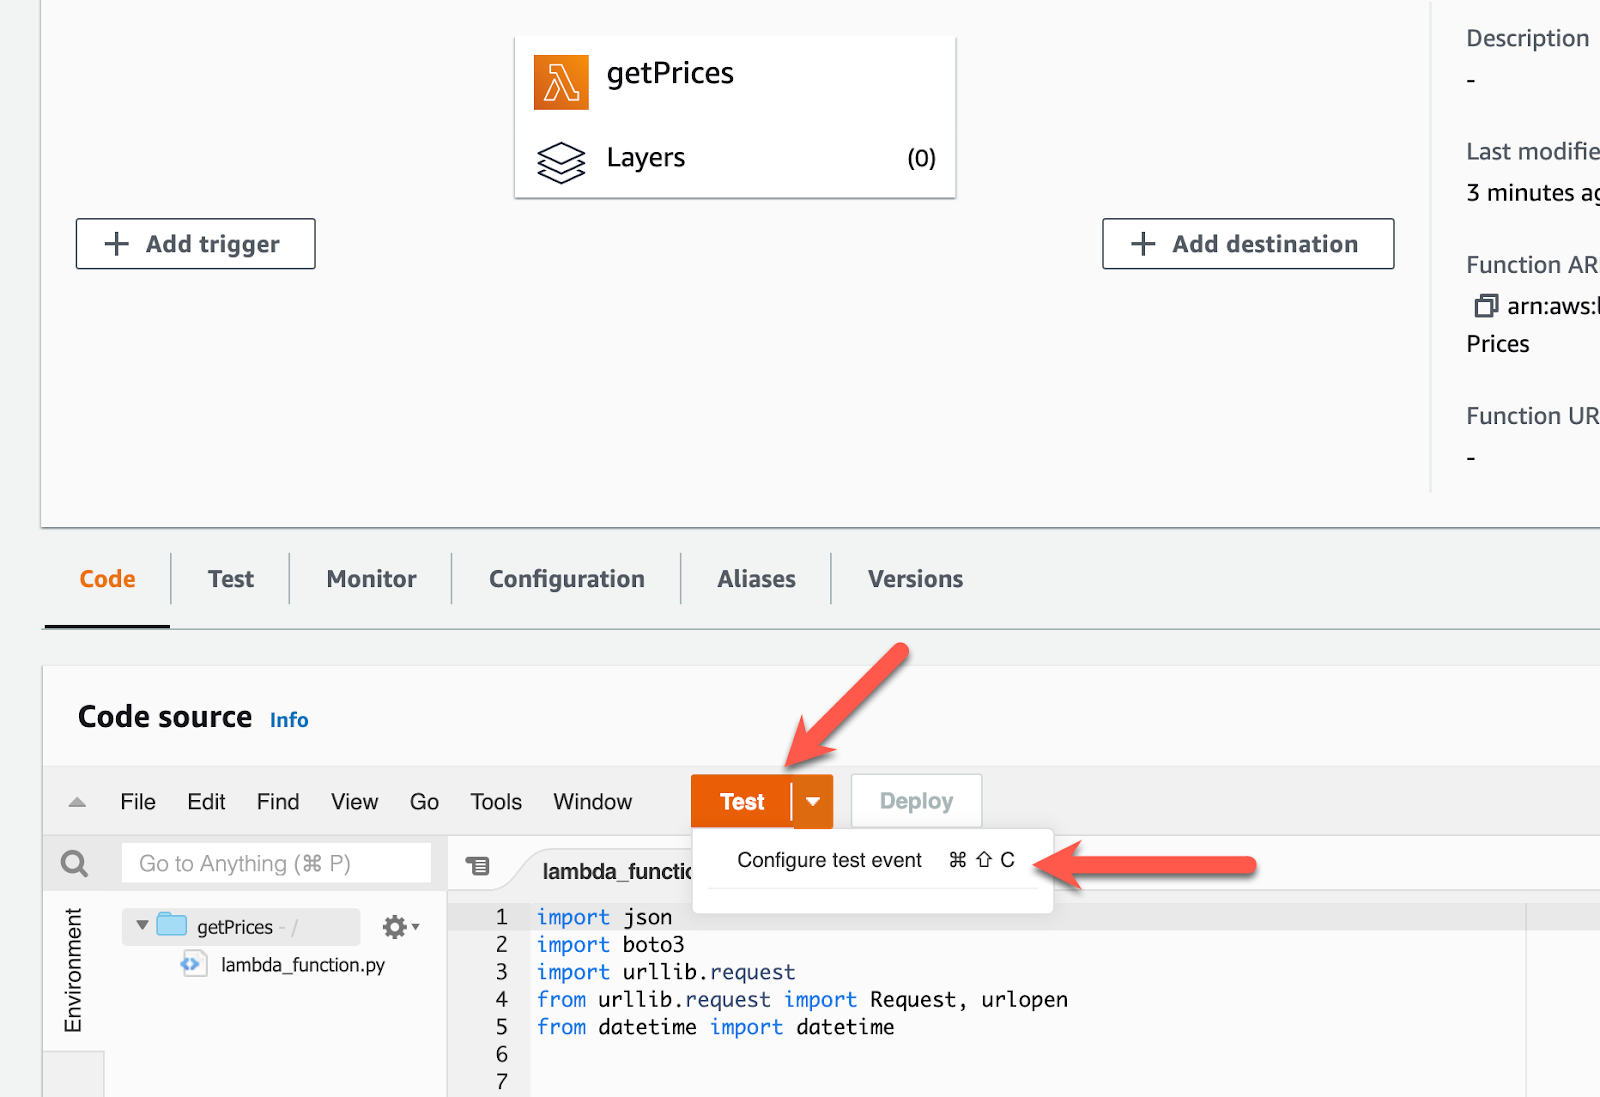
After creating the Lambda function, your screen will look like this:

We are going to work in the AWS Lambda editor for simplicity sake.
You can also zip up a local folder structure and use the AWS CLI to deploy the function, but I will not cover that here.
The Lambda Python runtime supports standard Python libraries by default. We will use several of them in our initial code – json, boto3, urllib, and datetime.
Replace the code in the Lambda editor with the following (the code is pretty simple – comments included to describe what it does):
import json
import boto3
from urllib.request import Request, urlopen
from datetime import datetime

#NOTE:  This is a helper function that will parse and return JSON
#from an event message body.  I have found this addresses various
#scenarios where messages have slightly different formats between
#production SQS and using the Test functionality.
def parse_message_body_json(message):
    message_body=message["body"]

    try:
        #Adjust our message body so that it parses correctly
        message_body=str(message_body)
        message_body=message_body.replace("'", "\"")
        message_body=message_body.strip('"')

        if '[' not in message_body:
            if ']' not in message_body:
                message_body="[%s]" % message_body.strip('"')

        message_body=json.loads(str(message_body))

    except Exception as error:
        print(error)
        print("Unable to parse JSON.")

    return message_body[0]


#The main handler for this Lambda function.
def lambda_handler(event, context):

    symbols = []
    json_return=[]

    #Verify we have event records and then parse each one.
    if "Records" in event:
        for message in event['Records']:
            print("Processing message...; message=%s" % message)

            message_body_json=parse_message_body_json(message)

            print(message_body_json)

            symbols.append(message_body_json["Symbol"])


    print(symbols)

    #Format date to send in the TIMESTAMP field
    now=datetime.now().strftime("%Y-%m-%d %H:%M:%S")

    #For each symbol (coin_pair) in our event message, retrieve the price.
    for coin_pair in symbols:
        url_spot="https://api.coinbase.com/v2/prices/%s/spot" % (coin_pair)

        try:
            #Get SPOT price
            req = Request(url_spot)
            req.add_header('Accept', 'application/json')
            req.add_header('User-Agent', 'Mozilla/5.0')

            with urlopen(req, timeout = 15) as response:
                raw_json = response.read()

                spot_details=json.loads(raw_json)


            #Store the result into JSON.  We will return this for now, but use it later.
            arr_single_coin=[]
            dict_single_coin={"Symbol": coin_pair, "Price": spot_details['data']['amount'], "Timestamp":now}
            arr_single_coin.append(dict_single_coin)

            json_return.append(arr_single_coin)

        except Exception as error:
            print("ERROR:  Failed to retrieve prices for %s" % coin_pair)
            print(error)


    #Return result
    return {
        'statusCode': 200,
        'body': json_return
    }
In simple terms, we are leveraging the public API of Coinbase to retrieve price data. Our function reads an event message to get a single coin symbol for the function to retrieve. (We will use this to scale frequency and symbols later).
Link to Coinbase API docs:
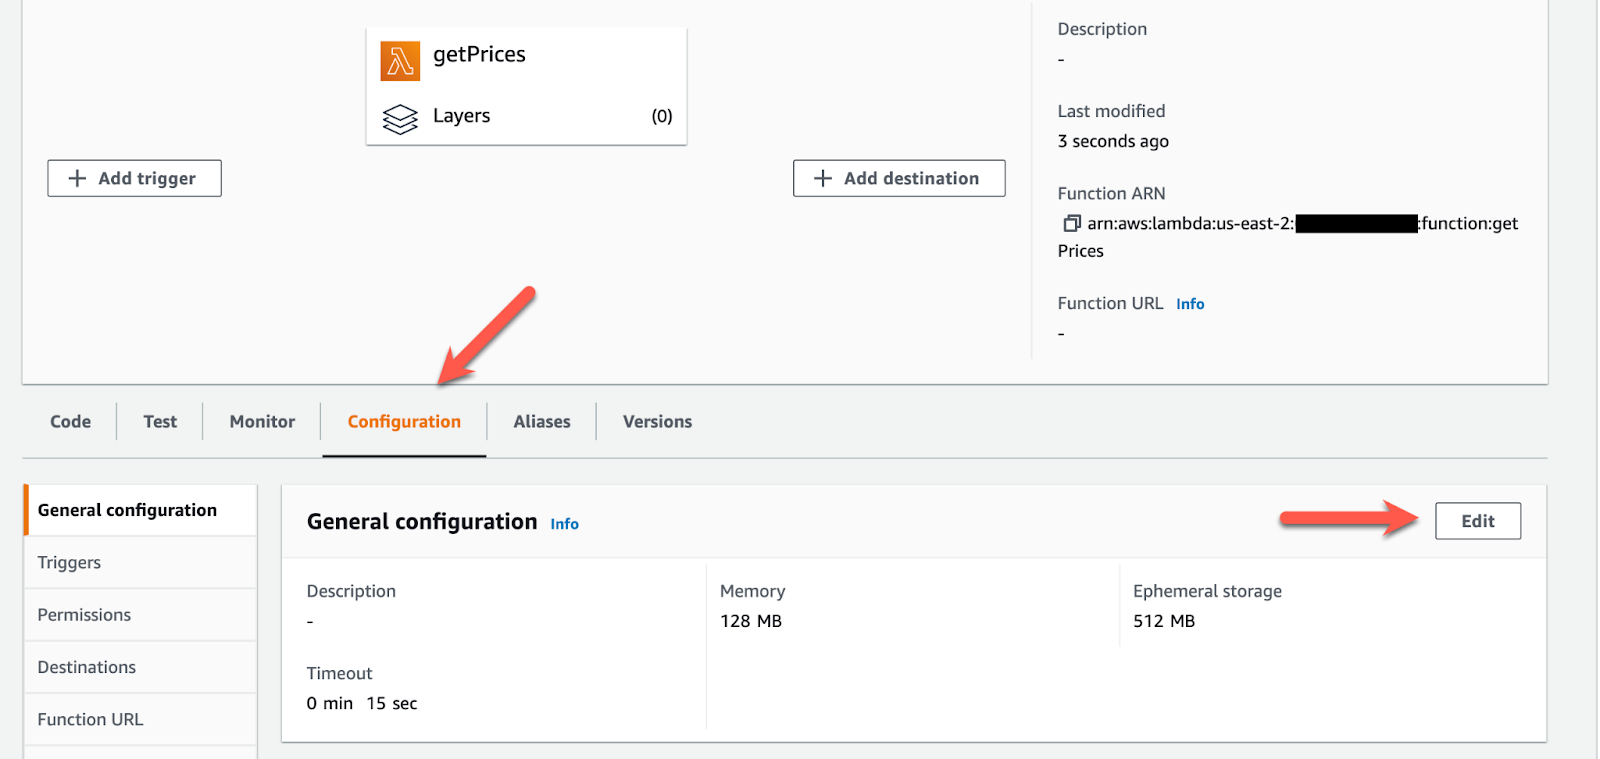
Configure The Function Timeout
Our code makes a call over the internet and that can sometimes take longer than the 3 second default Lambda function timeout. We need to set the function timeout to be slightly longer – we are going to change it to 15 seconds.

Testing Our Work
Create a test event message called “BTC-USD”. As I mentioned, you want to format this in the same way that you will receive data from an SQS queue (since we will use SQS messages to drive price retrieval later).
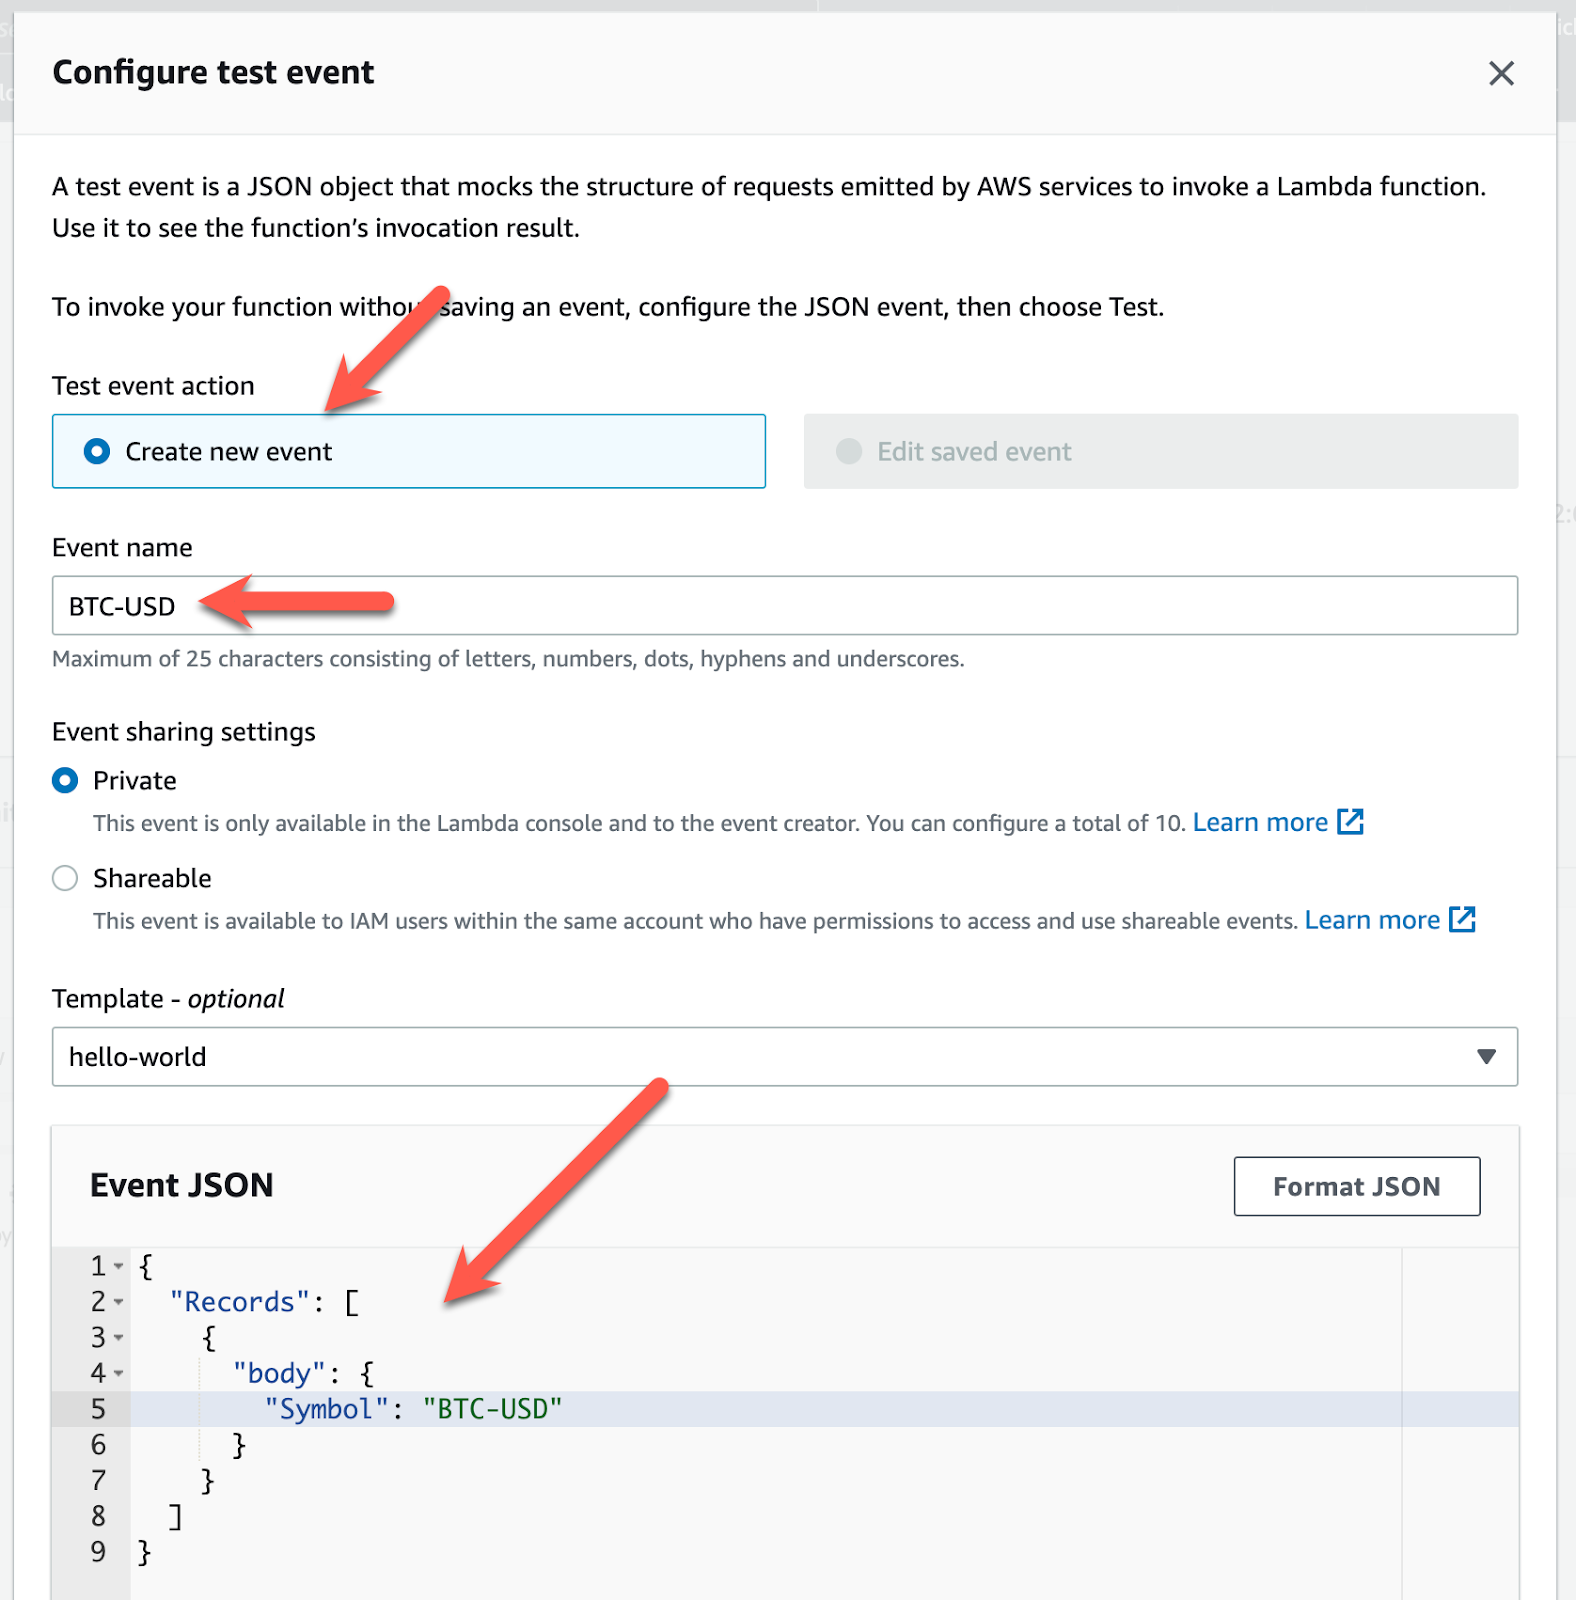
Here is the message that you can cut and paste:
{
  "Records": [
    {
      "body": {
        "Symbol": "BTC-USD"
      }
    }
  ]
}
The Symbol section of the JSON contains the symbol we will be retrieving price data for. You can change this.
Deploy your function.
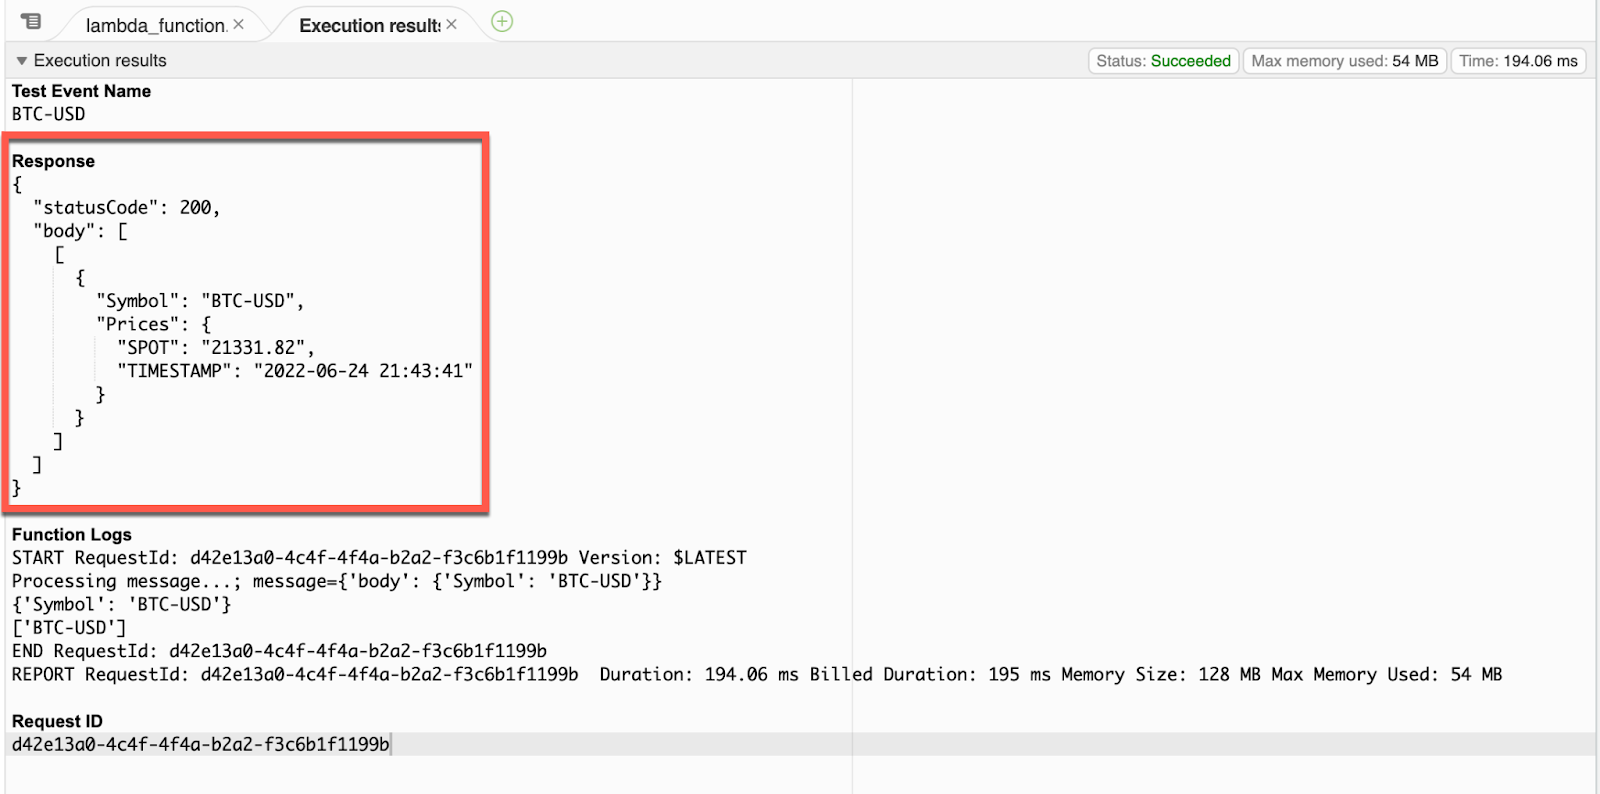
Select the BTC-USD message. Run Test.
You should see the current Bitcoin to USD price displayed.
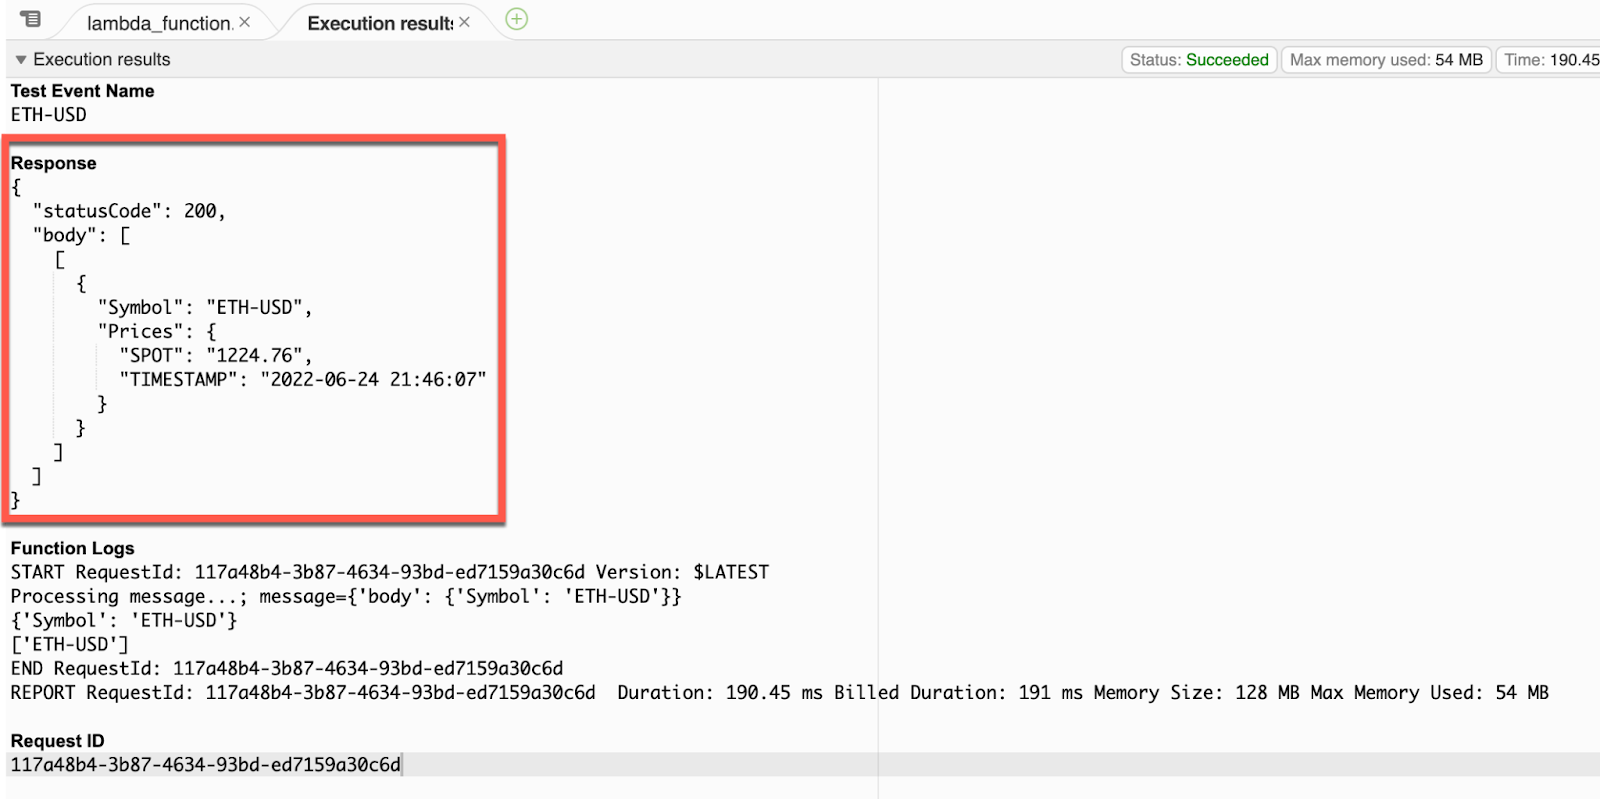
Create a second message for Ethereum (ETH-USD).
Select the ETH-USD message and run Test again.
You can also create a test message with multiple currency symbols listed.
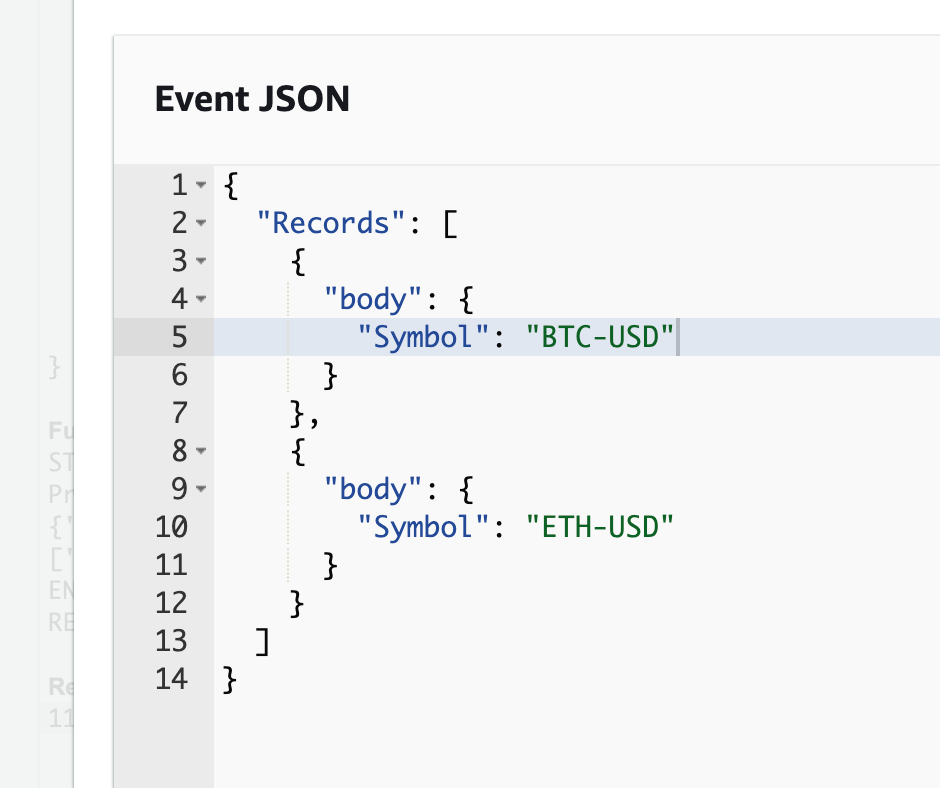
And you will get both prices returned.

That’s it! Now you have a serverless function that retrieves the price of any Coinbase supported crypto currency any time you want.
In Part 2, we will store the information in RDS and prepare to use it for trading!